How to Send Mass Emails With Mail Merge Word
/ptroendly.jpg)

Subscribe to get updates!
Table of Contents
When a mass email requires individualization, it is easy to feel overwhelmed. In the past, this would have required cutting and pasting a template into an email and manually entering in all the personal identifiers, then sending them off one by one. This was time consuming and left too much room for human error.
Microsoft saw this issue and created a way to make their products do all the work for you with Mail Merge. You may be thinking productivity software is not new, so why isn’t everyone using mail merge? While there is a bit of a learning curve, and when you are in a time crunch, that can add unnecessary stress. However, with some planning, helpful guides, and practice, using mail merge will speed up the process, provide some quality control and take the weight off your shoulders.
Here are the necessary steps to start you on your way to being a mail merge expert before your next mass mailer is due.
Step 1: Create an Excel sheet with personal identifiers
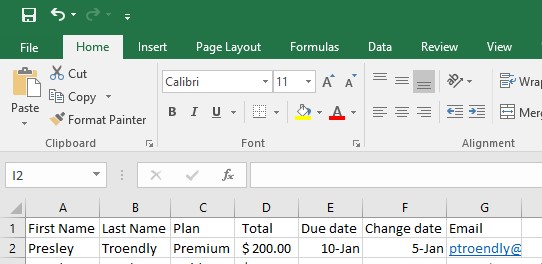
Personalizing mass emails is important. No one wants to read a vague document that leaves more questions than answers. To ensure that every email is correct, start a spreadsheet with each column header set as a different identifier, such as first name, last name, email, and any other information they may need to know that directly relates to the individual.
Once these identifiers are completed, save the document.
Step 2: Create your email in Microsoft Word
This may seem counterproductive, but with MS 365, you can send emails right from Word.
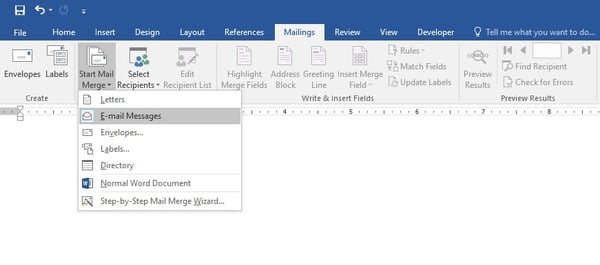
Open Word, select Mailing in the top ribbon, then select Email message.
Step 3: Your data source
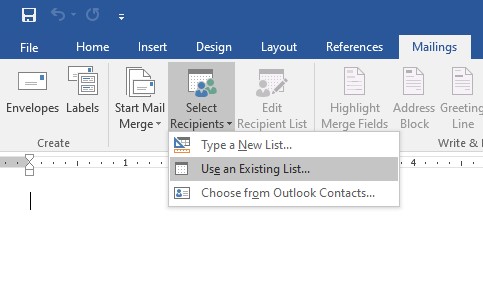
This is the time to import the list from Excel into your Word document. In Word you will click the Select Recipient button in the top ribbon, then select Use an Existing List.
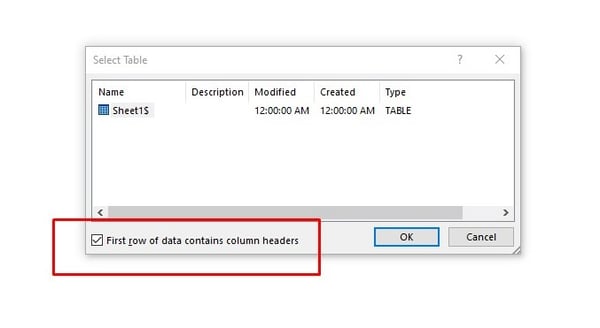
 This will open the file picker that will let you find the saved Excel sheet. Once selected, it will ask you which table you want to use. Click all that apply. There is also a box that should be click called First row of data contains column headers; this is what allows mail merger to fill in the placeholders with the correct information. If left unchecked, the email will not fill out correctly.
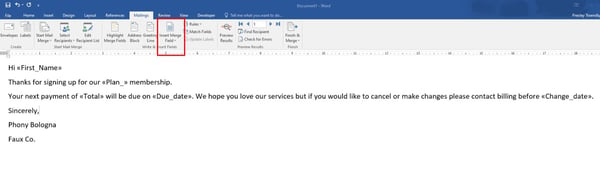
 Step 4: Write your email
In the Email format, write out your message with placeholders for the personal identifiers, to do this click Insert Merge Field in the top ribbon and pick the identifier you need. This placeholders should start and end with carrots, like this <<First_Name>>.
 Step 5: Check your work
Once finished writing the email, you will want to make sure everything is working as planned.
In the top ribbon under Mailing, you will see the Preview Results button, click there, and it will show you each recipient with the placeholders filled in them with (hopefully) the correct information.
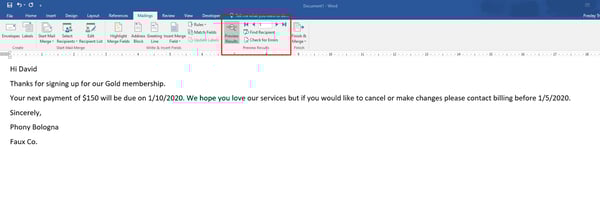
Once finished, preview your results again. If it looks correct, unclick Preview results.
Step 6: Complete your mail merge
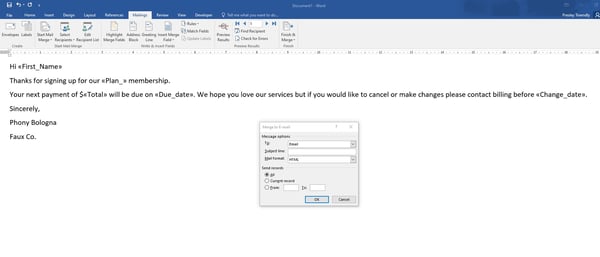
When you are ready, click Finish and Merge, then click Send in Email Messages.

A popup box will appear asking for the following information: To, Subject line, Mail format, and Send records. In this box, all you need to do is write a subject link and make sure that Send records are marked correctly. Send Records tells the Word document which contacts should be receiving your email from the data source selected. By checking, All, you will send it to everyone on your excel sheet. Then click Ok to start the merge. That is it; your emails have been sent!
Learning new ways to use Microsoft 365 can feel overwhelming, but breaking them down into more digestible pieces improves employee productivity and peace of mind. If you would like more helpful tips on Microsoft 365, sign up to receive our 365 Tip of the Week.
This newsletter highlights the best videos and articles on Microsoft 365, picked by a human that has actually walked through all the steps. No gimmicks or sales pitches, just the best information weekly.


IT Outsourcing for Construction: Building Projects Without IT Issues
A Familiar Scene on the Job Site It’s early morning at a busy construction site. Crews are unloading materials,..

Your Connection to This Site is Not Secure: What It Means and How to Stay Safe
If you’ve ever visited a website and noticed the warning “Your connection to this site is not secure” in your browser,..
.svg)
Hackers Are Watching and Waiting… Don’t Risk Your Business and Future
Hackers Are Watching and Waiting… Don’t Risk Your Business and Future In today’s rapidly evolving digital landscape,..